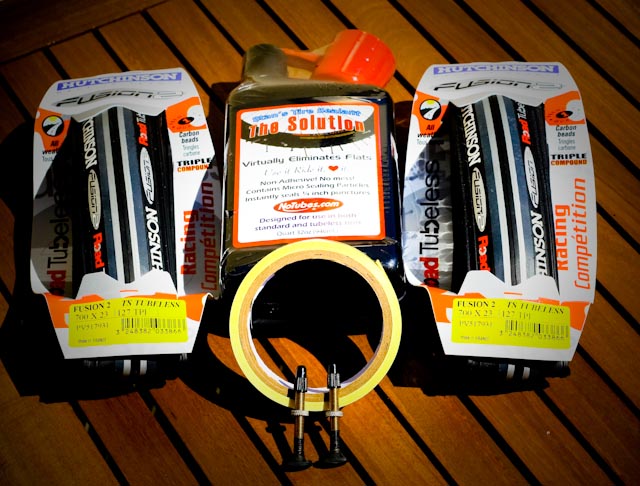
A very well kept secret in the world of tires is that you can use the Hutchinson Fusion 2 Tubeless Tires on a regular set of everyday rims. “But I thought they could only be used on specially made like Dura Ace or Falcrum Zero wheels?”, you ask. Not so. Me being me, I got very excited when I first heard this. I just had to try it. Maybe I’ve been riding my bike too much and haven’t been paying close enough attention to the tech world , but I thought that if I hadn’t heard anything about this, there’s probably a few other cyclists out there who didn’t know this either.
The gracious folks at TFM Prahran gave me some Hutchinson Fusion 2 Tubeless Tires to try this out with. There’s a bit of a process to doing this, but it’s not nearly as overwhelming as it looks at first. I’ll strip this down and tell you everything you need to know without all the other junk.
Why would you want to use a set of tubeless tires anyway? Tubes have been working great since the dinosaurs roamed the Earth. Well for one, you can run tubeless tires at a lower pressure without worrying about a pinch flat. This comes in handy when its wet out and you need better grip for cornering, or if you want a bit more of a comfortable ride. Recommended pressure on these tires are between 100-125psi. The weight difference between this setup and a regular tube/tire is negligible. These Hutchinson Tubeless tires weigh 290g each. A tube/tire setup is approximately 220g (tire) + 70g (tube) - depending on the tire and tube you go with.
Also, with the Stan’s tire sealant in the tire, you can put a bullet through these tires and you won’t flat. Stan’s will seal it every time. If you get a nasty slice in your tire, then you can always get a $5 bill out and put a regular tube in there and ride home like you would have one with a traditional tire/tube.
What You Need
- Hutchinson Fusion 2 Tubeless Tire(s)
- Stan’s Tire Sealant (can also buy in small 2 ounce bottles)
- 21mm tubeless rim tape
- 44mm Tubeless Road Valve Stems

The Process
The process of installing these tires is dead simple. You can read about it here and see the video below:
I found that my Eurus’ installed flawlessly. The didn’t even need the Stans to inflate and kept the air in without any problems. The Mavic Open Pros have spoke holes in the rim so there’s much more potential for leakage. I had a small amount of difficulty getting the Open Pros pumped up and sealing the bead (mostly around the valve stem), but once I worked it out it was fine. The next morning the Eurus’ didn’t loose a PSI of pressure but the Mavic’s lost about half. I pumped them up again and left them overnight. After the Stan’s sealed everything they didn’t lose any pressure overnight.
Over the coming months I’ll keep you posted on how these tires are holding up and how they perform. If you have any installation issues feel free to ask. There’s a couple things on the video that aren’t obvious if you’re doing this for the first time. That said, it’s quite straightforward and really simple. It took me about 1hr. Will take me about 20mins the next time I do it.
BTW, I tried to copy the composition of this shot from Velodramatic. I still have lots to learn about photography…


